|
|
| This is a non-commercial web site. Advertising is not accepted. I am not being paid for any mention or promotion. |
| To translate this page from English select a language |
 happiness |
808
Car Keys Micro Camera Review hope it can help your life safe and happiness |
happiness |
#1 Camera
The #1 is one version of the 808 car keys micro camera.
| 2010 Jan 04 - FYI Some engineering drawing of the #1 camera |
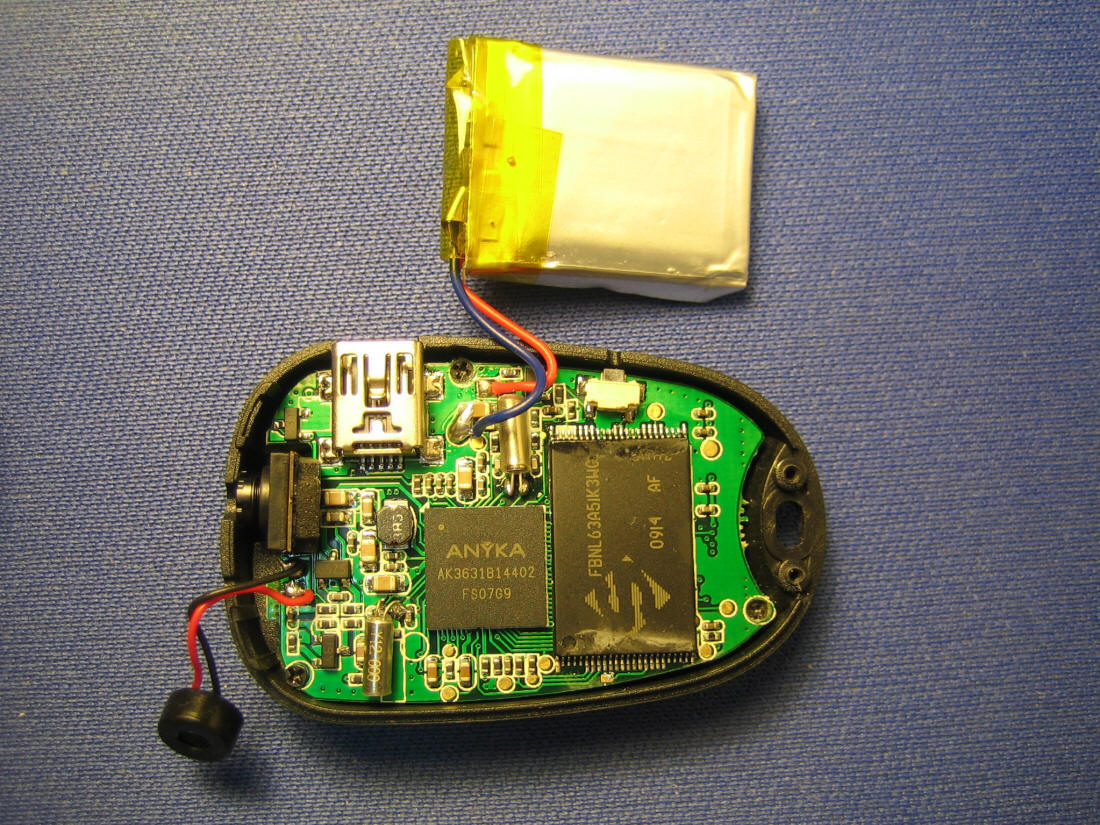
Here are a couple of component maps for the #1 Camera.
Click for full size. I don't have a schematic, bill of materials or
artwork.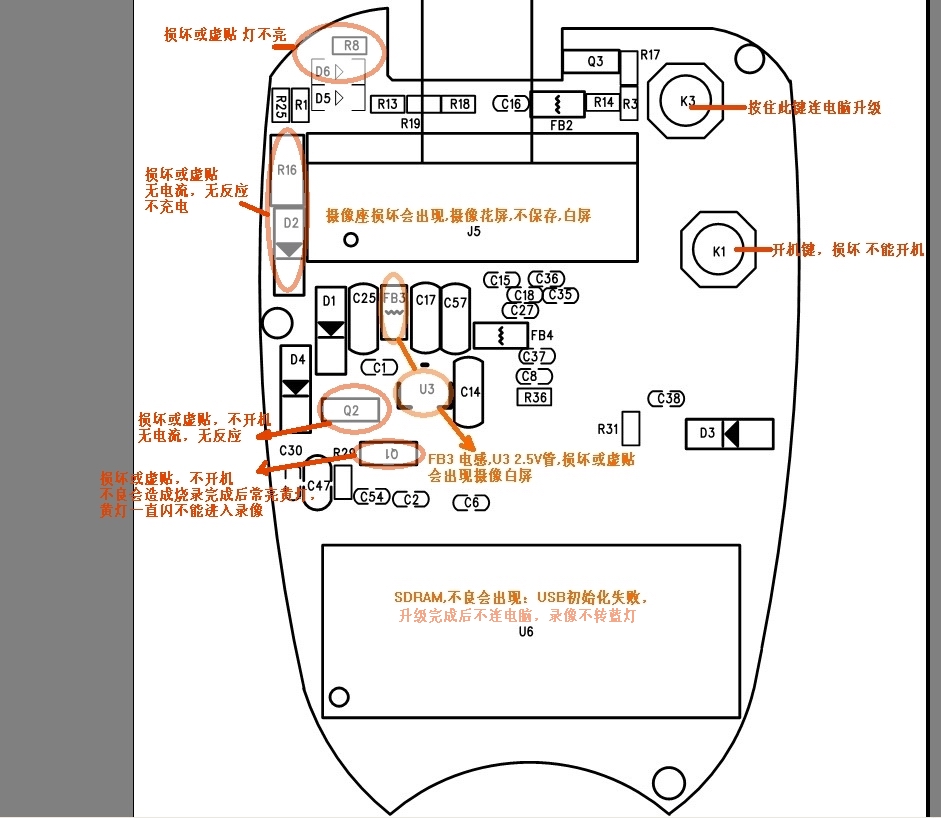
 |
| 2010 Jan 03 - Camera #1, Date Time Stamp Removed, New Bin Files, Low Duplicate Frame Rate | ||||||||||
 #1 Camera ●Date Time Stamp Removed ●New Bin Files - Lowers the Duplicate Frame Rate |
||||||||||
| A big piece of the #1 camera puzzle
has been solved. I received an
email from Masato. He has directed me to new BIN files
for the #1 camera that removes the date time stamp, and
reduces the duplicate frame rate! I have installed the new bin files on my #1 camera and they work. I hope that they work on your #1 camera. You can choose to continue to use the current font file and have the video date time stamp overlay, or replace the font file with the blank font file and have no overlay. 1. VIDEO DATE TIME STAMP REMOVED - A new DynamicFont4_16.bin file has a font that is blank. This completely removes the video date time stamp overlay. The video upper left corner has no date time stamp artifacts. Even if you remove the video date time stamp, you still want to set the date time with the time.txt file because the AVI and JPG files are stamped with the date time. Some people have reported that setting the date time has fixed some unusual video length problems. 2. FRAME RATE 15 FPS, LOW DUPLICATE FRAME RATE - The frame rate in the AVI file has been reduced from 25 FPS to 15 FPS. This is good because the processor could not keep up with 25 FPS and generated many duplicate frames. The duplicate frame rate has dropped dramatically from about 12 per second to less than one per second. A new test AVI file contains 121 frames (8.07 seconds). The first 7 frames are duplicates. Then there are 4 more random duplicates in the file. Ignoring the initial duplicate group, that's 4 duplicates in 114 frames (7.6 seconds) or much less than one duplicate per second. That is a lower duplicate frame rate than a #3 camera. If you have a Windows computer, use the Anyka burntool to update your #1 camera. After the update, to disable the video date time stamp, overwrite the camera DynamicFont4_16.bin file with the blank font file. If you have a Mac or Linux computer and can't run a Windows application, use the following procedure to update your #1 camera. Use these files at your own risk. They work in my #1 camera. These are the new bin files. Use this "DynamicFont4_16.bin" file to enable display of the date time stamp overlay. There is just enough room in the bin partition for one copy of these files. Download this RAR file 611_VGA_V1.06 (with time) 4_16sdrm.rar (5 MB) which contains the following 4 files
Use this file at your own risk. It works in my #1 camera. Use this file to disable display of the date time stamp overlay. Replace the DynamicFont4_16.bin file on the camera with this blank font file.
Installation Instructions Put your camera into system mode. Backup the camera bin files (in case you want to restore them). Replace the old bin files with the new bin files. The new files go in the camera's first partition where the bin files are. If you want to disable the date time stamp use the blank font file on the camera. Disconnect the USB cable. It is important now to reset the camera. |
| 22 Nov 2009 - How to raise a #1 camera from the dead! |
| 3 Jan 2010 - Use these bin files
- they are newer and work great on my #1 camera. No need to
press reset after each video. A camera owner named Michael from Germany emailed me about how he restored his dead #1 camera. He used system mode, reformatted, and restored the system files.
Michael wrote: 1. Use system mode to boot your camera. The flash memory contains three partitions. Windows should load a drive letter for each partition. On my computer Windows opens the drives in this order: BIN files, SYSTEM files, then USER files. The drive letters depend on your computer configuration. Write down which drive has the *.bin files. Your files are probably corrupt, but save them to your computer drive, just in case you want to restore them. 2. Use Windows to reformat each camera drive. Run Windows check disk on each camera drive and select "automatically fix file system errors" and "scan for and attempt recovery of bad sectors". After formatting, your camera drive might report a smaller size (correct size) like 4GB instead of 8GB. This is normal because the flash was deceptively reporting the wrong size. 3. Download key cam.zip (4520012 bytes) and upzip the files to the correct camera drive. Use these bin files. ● partition window 1 the bin drive - AkResData.Bin, DynamicFont4_16.bin, LangCodepage.bin, Spring.bin ● partition window 2 the system drive - (the camera creates these files) ● Partition window 3 the user drive - (the camera creates the AVI and JPG files here) IMAGE\RECORD, VIDEO\RECORD 4. Disconnect the USB cable, press the reset button, and try your camera. It should work. Mine did. If your flash is faulty, I don't know how long this fix will last. Good luck. I hope this procedure works for you. My restored camera is much better than dead, but not fully functional. Here is an inventory of what works, and what does not. WORKS I can set the date time using the time.txt file. I can take an unlimited number of still images. I can turn the camera on, and off. When I connect the camera Windows installs it as a mass storage device. System mode works. DOES NOT COMPLETELY WORK After each video I must press reset. When the camera is on, if I press and hold the mode button, the LED flashes three times, the LED goes out, the camera takes video. When I press the mode button to stop the video, the video stops (the AVI file is OK), but the LED does not come on. No buttons respond. The camera is not functional until I press reset. When you use the latest bin files you camera should be fully functional, except for any problem caused by bad flash memory. |
| Sample Audio from Camera #1 |
| 808/audio/2009-09-29 13-39-02 audio test.wav |
| Sample Photos from Camera #1 | ||
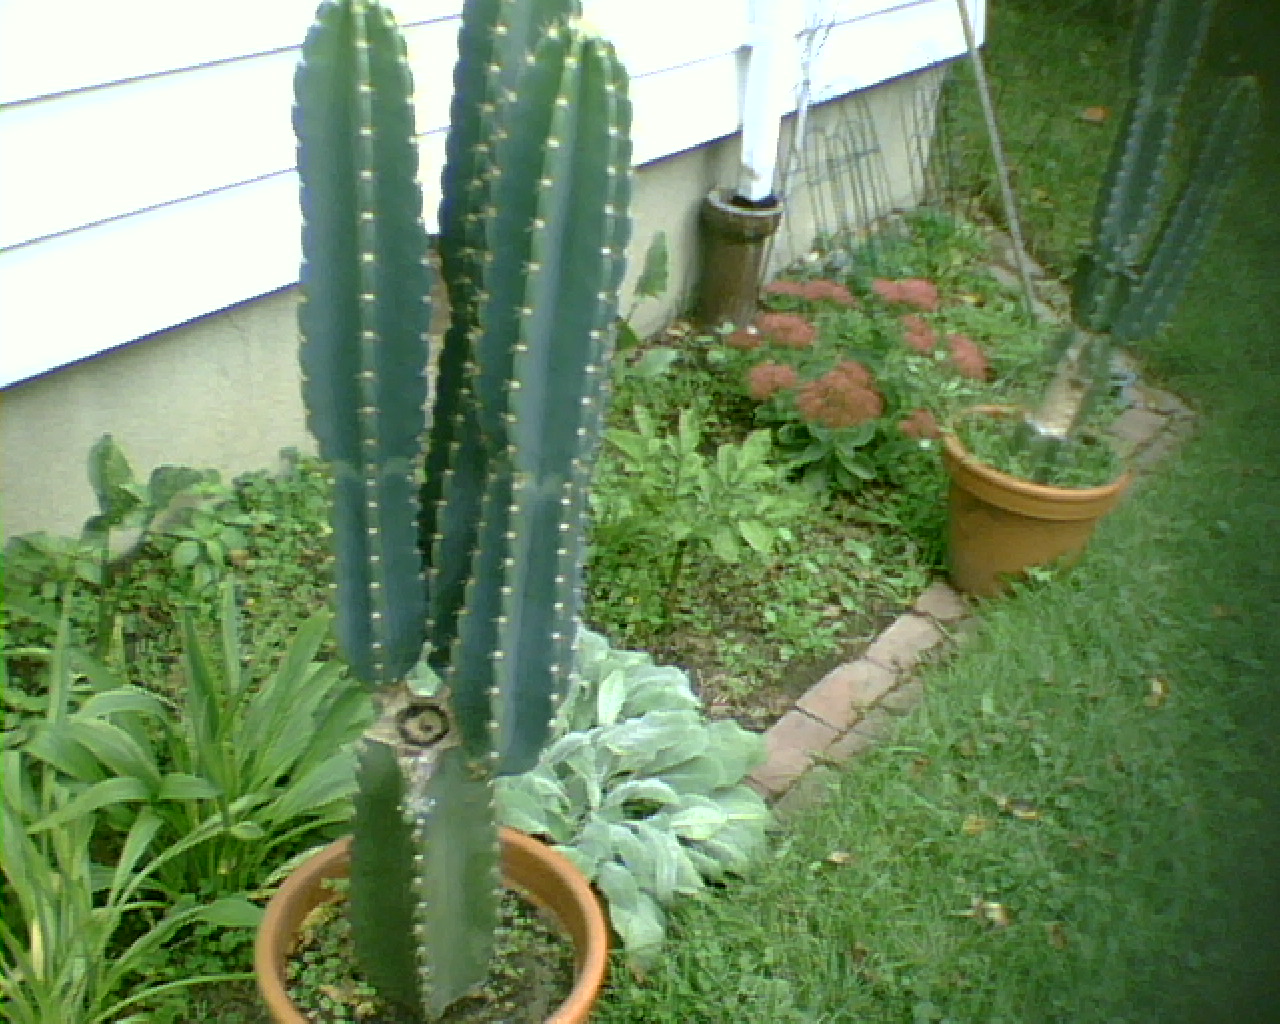 |
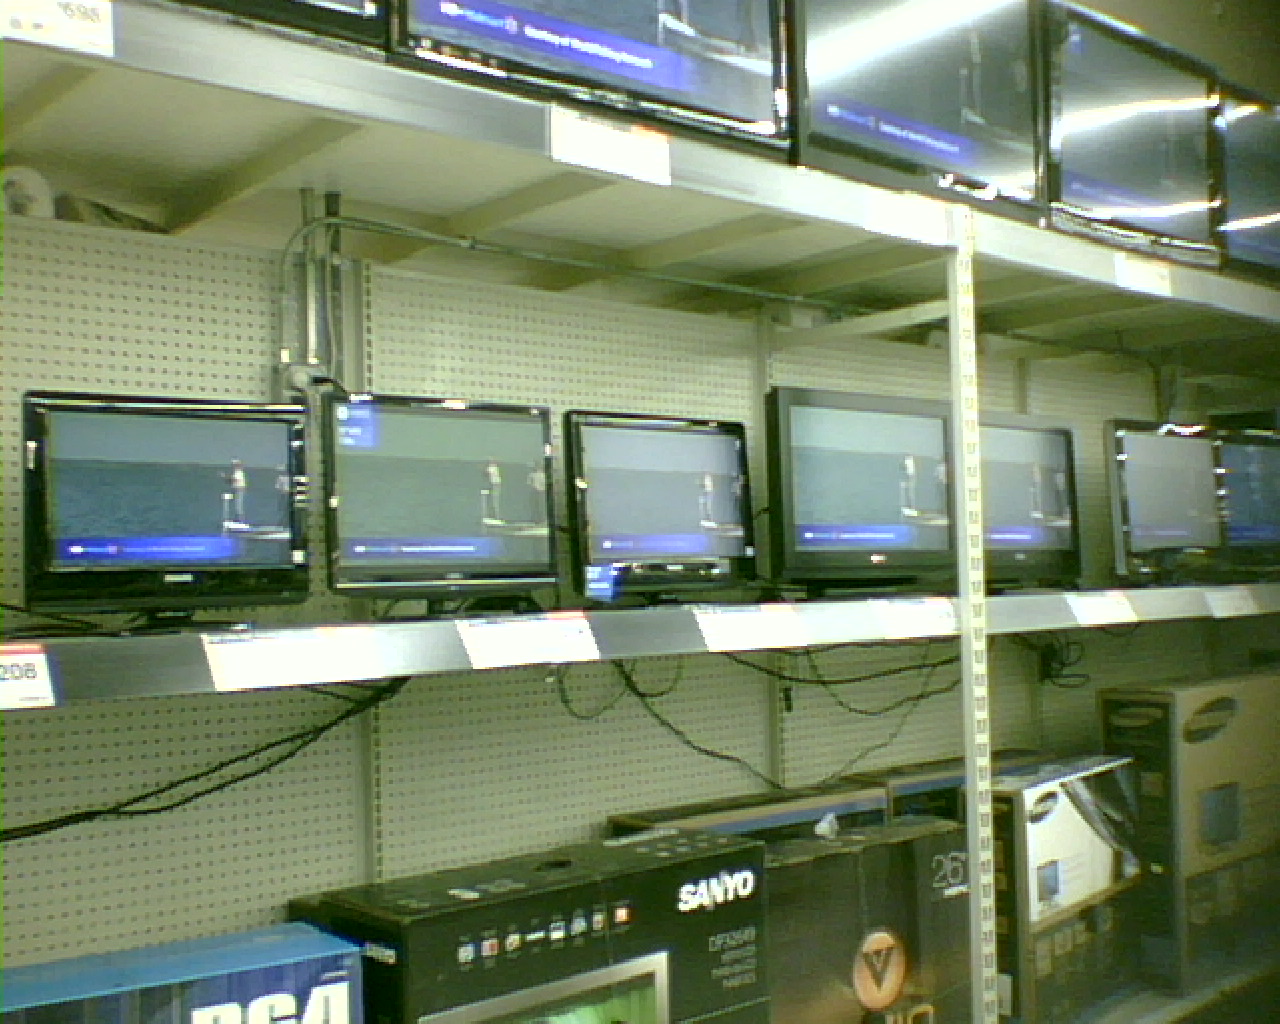 |
|
| Click for full size - Still Indoor Photo, hand held, 1280x1024 JPG, (348KB) | ||
| Description of Camera #1 | ||
| OVERALL IMPRESSION - Once
you figure out how it works, and understand it's limitations, it
works amazingly well. It is useful as a "webcam" quality
micro
video camera, a good quality audio recorder, a toy quality photo
camera, or an 8GB flash drive. At 15 grams it is light enough
to be build it into an RC plane, car, boat, or even a model
rocket. MISLEADING CLAIMS - Claim: 1280x1024 photos. The native CMOS resolution seems to be 640x480. Still images are up scaled to 1280x1024 in the JPG file. Claim: 30 fps video. The native fps is about 12.5 and the AVI fps is 25. Claim: 2 hour record. The flash might hold that much but the rechargeable battery is out at about 50 minutes of video. DOCUMENTATION - The documentation is a legendary example of broken English and is barely understandable. With intuition and trial and error you can figure it out. AUDIO - The video mode records audio. There is no "audio only" mode. The audio quality and recording levels are good and not over modulated, so consider using the video mode as an audio recorder. VIDEO - The color video quality is like a cheap webcam with video noise and a slow shutter that results in motion blur. Because the camera has so little mass, hand held shake is severe. It's best to use it on a solid surface. The native frame rate seems to be about 12.5 fps and each frame is duplicated to 25 fps in the AVI file. The automatic video exposure works and is optimized for indoor light or a cloudy day. In bright outdoor light the video is over bright and washed out. The small date time stamp in the upper left corner of the video can not be disabled. The total AVI bit rate seems to depend on the video content. I'm still studying that. PHOTOS - There is a very slow shutter and an huge lag time. The still image resolution is 640x480 and is up scaled to 1280x1024 in the JPG file. |
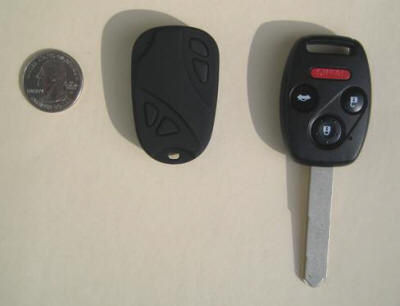
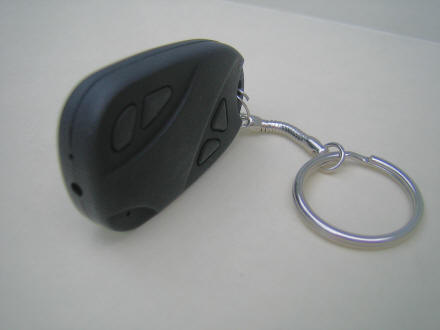
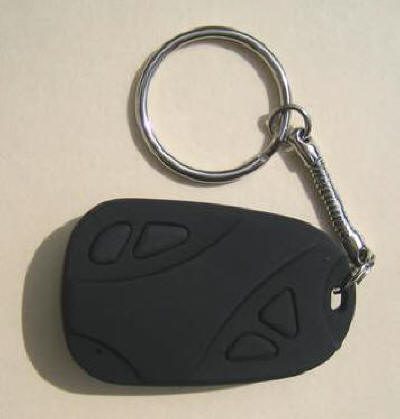
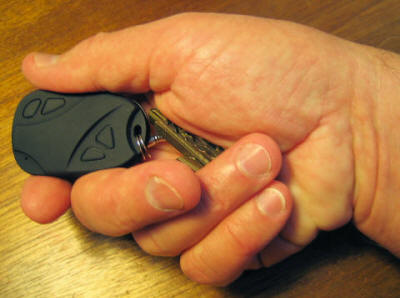
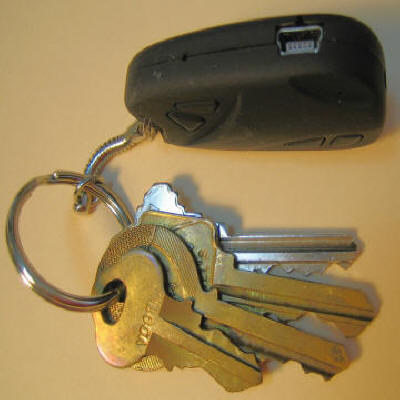
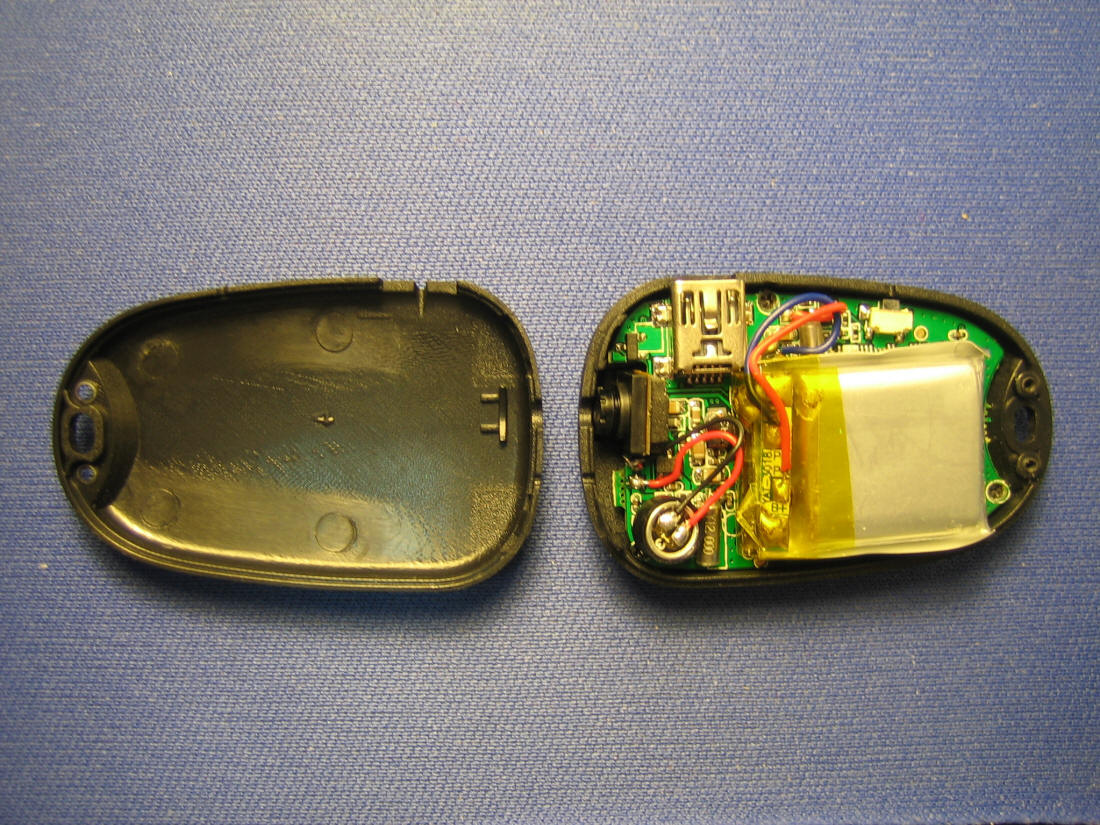
PHYSICAL DESCRIPTION - The camera is in the form factor
of a key fob and comes with a key chain (detachable). The finish
is flat black plastic, with no manufacturing name or text of any
kind on the surface. There are 4 un-labeled buttons. Two are
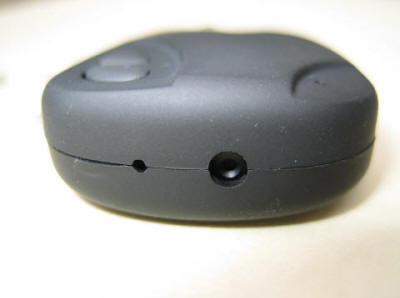
real and two are fake. The lens and microphone are on the end of
the fob opposite the key chain, and are behind a 3mm and 1mm
hole respectively. The included manual does not document the
reset button 1mm hole in the side. There are two Philips head
screws at the key chain end that hold the top and bottom halves
together. The camera is very light at 15 grams, and the key chain weighs 4 grams, so camera and key chain together weigh 19 grams (about 0.7 OZ). The camera is 50mm x 32m x 13mm (2” x 1.25” x 0.5”) . NOTES VGA - 640x480 SXGA - 1280x1024 FPS - Frames Per Second SPS - Samples Per Second |
|
| Table of Camera #1 Features | ||
| Feature |
Described / Claim |
Empirical Measurements |
|
Image Sensor |
CMOS |
Color |
|
Place of Origin |
Zhejiang China |
? |
|
Mode |
Digital Video Recording |
|
|
Model Number |
808 car keys micro-camera |
|
|
Port |
Shanghai |
? |
|
Optical Zoom |
25X |
? |
|
Flash Memory |
2GB or 4GB or 8GB |
8GB |
| Flash Performance via USB | Write Speed 2200000 Bytes per second Read Speed 5800000 Bytes per second |
|
| Battery Charge Time from USB | "Charge time about 2 hours" | If fully discharged (3.6V) slightly less than one hour. |
| Hours of Video Operation | "With Real 4GB flash memory for as long as 2 hours video recording" | After 50 minutes the recording stopped and the AVI file was saved to Flash. It played OK. 1,289,921,394 bytes (25.8 MB/min) (430 KB/sec) (3440 Kb/sec) |
|
Orientation |
The video and images are right-side-up when the buttons are on the left. If the buttons are up, images will be rotated 90 degrees counter clockwise. | |
|
Video Stream |
AVI, 640X480 VGA, 30
fps
|
Sensor resolution seems to be 640x480.
The codec is MJPG (Motion JPG). The native FPS is
about 12.5 and is up scaled to 25 fps in the AVI file (each
sensor frame is duplicated in the AVI file). One example video stream measured 2596000 bits per second, but this is variable and depends on the frame content. |
|
Audio Stream |
The audio part of the AVI is PCM uncompressed, Mono, 16 bit, 8000 samples per second (128000 bits per second). |
|
|
AVI File Format |
Container - AVI The AVI file has one video stream and one
audio stream. |
|
|
Still Image dimensions |
1280X960 |
The sensor resolution is 640x480 and is up scaled to 1280x1024 in the JPG file. Like the video mode, the image mode can't resolve more than 213 horizontal checkerboard squares, so this confirms the up scaling from 640x480. |
|
Still Image File format |
JPG, each file is between 250K bytes and 450K bytes. | |
|
Battery |
LiPo 180 mAh, 3.7V. |
The shape, voltage and micro protection circuit board on the battery would indicate that this is a rechargeable LiPo battery. |
| Chips Used |
SpecTek
FBNL63A51K3WG-AF - 32G bit NAND Flash Company SpecTek FBNL63A51K3WG-AF - 32G bit NAND Flash Distributor ANYKA AK3631B14402 - mobile multimedia application processors, USB, encoder for MJPG AVI and JPG K4S641632F-TC75 - Samsung 8 Megabyte SDRAM |
|
| 2009 Nov 04 - Camera #1 System Mode Button Trick |
|
Nirtocharged on the parallax forum revealed this secret about the #1 camera that I didn't know. This works even on my dead #1 camera. This only works for a #1 camera. Start with the camera off. Press and hold the power button for 10 seconds, connect the USB cable, then release the power button. You must have the power button pressed when you connect the USB. The internal flash memory has three partitions. Windows will assign a drive letter and load an explorer window, for each partition. On my #1 camera the folders and files in the three partitions are: How to
update the firmware on the #1 camera |
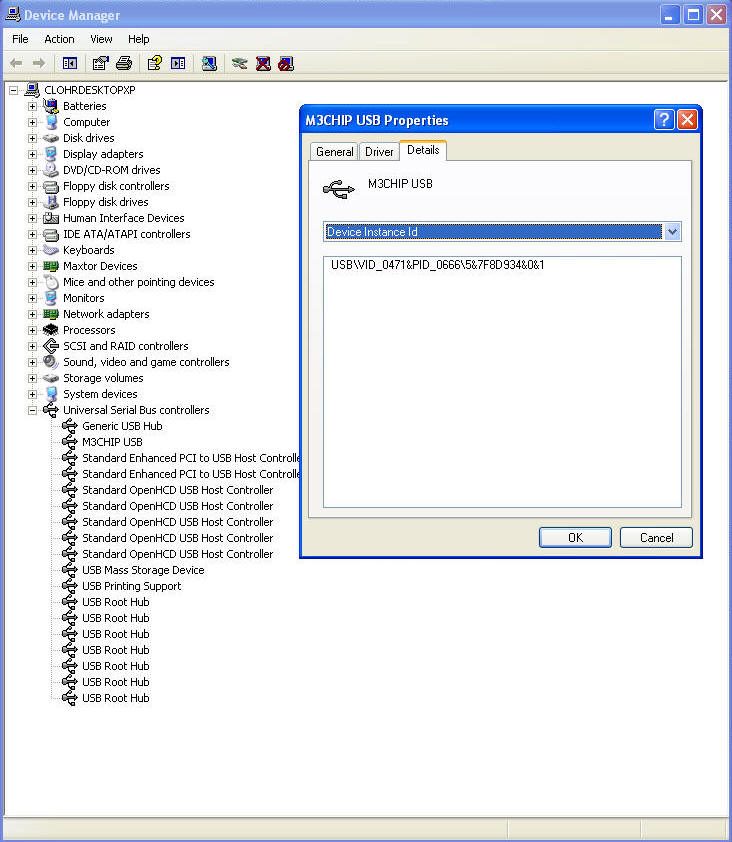
| 22010 Feb 22 - #1 Camera, Driver for the Anyka Burntool. Hardware ID (0471 0666). | |
|
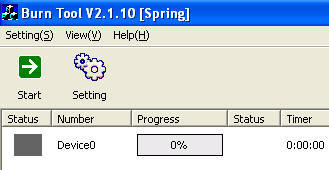
Bootstrap and 0471 0666 update from 2009 Nov 04. The following procedure is for the #1 camera only. Do not run the burntool on any other type of camera.
BURN MODE - To use the burntool and the M3USB driver, the #1 camera must be in burn mode. To get into burn mode - Start with the camera and the LED off. Press and hold the mode button, then connect the USB cable. Release the mode button. Windows will either ask to install the M3USB driver, or use it if already installed. Download this file. It contains the firmware for the #1 camera and the burntool (about 5 megabytes). 611_VGA_V1.06 (with time) 4_16sdrm.rar.
In one place on the internet VID_0471&PID_0666 is a “Philips PDIUSBD12
SMART Evaluation Board”. See below. [HKEY_LOCAL_MACHINE\Enum\USB\VID_0471&PID_0666]
[HKEY_LOCAL_MACHINE\Enum\USB\VID_0471&PID_0666\INST_0]
"Capabilities"=hex:14,00,00,00
"HardwareID"="USB\\VID_0471&PID_0666&REV_0100,USB\\VID_0471&PID_0666"
"CompatibleIDs"="USB\\CLASS_DC&SUBCLASS_A0&PROT_B0,USB\\CLASS_DC&SUBCLASS_A0,USB\\CLASS_DC"
"DeviceDesc"="Philips PDIUSBD12 SMART Evaluation Board"
"Class"="USB"
"Driver"="USB\\0002"
"Mfg"="Philips"
"ClassGUID"="{36FC9E60-C465-11CF-8056-444553540000}"
"ConfigFlags"=hex:00,00,00,00
BOOTSTRAP MODE - Bootstrap mode does not seem to have any purpose. It makes Windows look for a hardware ID driver of (vid
pid) 0000 0000. To get into bootstrap mode: Start
with the camera and the LED off. Hold the mode button down and
press the power button. Then release both buttons. Then
connect the USB cable. Windows might acknowledge a new USB
device and try to load a driver for hardware ID 0000 0000.
Windows will not find a driver. |
| 2010 Feb 22 - #1 Camera Webcam Driver |
 Thanks to M.D. for this driver information. The #1 camera uses the USBAnyka Driver.
The hardware ID is 04D6 065E. Thanks to M.D. for this driver information. The #1 camera uses the USBAnyka Driver.
The hardware ID is 04D6 065E.How to enter webcam mode on the #1 camera - Connect the USB cable. Once Windows installs the mass storage device, press the camera power button for 2 seconds. The first time you do this, have this webcam driver unzipped and ready: (software/AK36361B平台PC Camera驱动/ak3631_PC_Camera.rar) The webcam operates at 320x240 on my computer. Verified to work with with Skype and VirtualDub. |
|
Update 17 Nov 2009 -
My #1 camera failed because of defective fake counterfeit flash
memory (see SOSFakeFlash) |
| If your #1 camera has failed, try
system mode, and run the
H2testw program on the flash memory to see if it is bad.
This test can take hours to run. Reformatting the drive is not
a good flash test. I was able to
revive my dead #1 camera. There is a huge counterfeit flash memory scandal going on concerning products from China that are often sold on eBay. My #1 (8GB) camera failed because a 4GB (32 gigabit) flash chip that did not pass quality control (QC) was reprogrammed to look like an 8GB part and used in my micro camera. These parts should have been scrapped. Many products containing bad flash have been sold on eBay. These products include USB flash drives, SD flash cards, MP3 players, and micro cameras. I bought an 8GB #1 camera from an eBay seller xprodeal in China. When new, Windows reported my #1 camera to be an 8GB mass storage device though I never put more than 4GB on it. As I reported in my tear down video, this camera has a SpecTek FBNL63A51K3WG-AF flash chip in it. That is a 32 gigabit (4 gigabyte) chip. I never raised a flag about the fact that a 4GB flash chip is being used in my 8GB camera, and I should have. The camera failed on October 19 2009. Since then, when the camera is connected to the USB Windows does not see it. I went into system mode and successfully reformatted the flash. Now Windows reports the flash to be 4GB. I ran the H2testw program on this flash to test it. It took 5 hours to run. H2testw reports the flash bad. Here is the report from H2testw: Writing, 3885 MByte, 3:30:32 h, 315
Kbyte/s 3.7 GByte OK (7949238 sectors) 3.5 MByte DATA LOST (7242 sectors) Details:70 KByte overwritten (140 sectors) 3.3 MByte slightly changed (< 8 bit/sector, 6902 sectors) 100 KByte corrupted (200 sectors) 70 KByte aliased memory (140 sectors) First error at offset: 0x0000000000003000 Expected: 0x0000000000003000 Found: 0x0000000008003000 H2testw version 1.3 Writing speed: 315 KByte/s Reading speed: 741 KByte/s H2testw v1.4 |
|
|
|
 Graveyard of micro cameras |
My #1 8GB camera is dead. It worked from Sept 22
2009 to Oct
19 2009.
The current symptoms are: ● When the USB is connected the LED comes on but the camera will not connect . Tried with 2 different computers and 4 different USB cables. ● The power button turns the LED on and then the LED blinks 2 seconds later, but then the buttons don't work. ● The reset switch turns the LED off. ● Even though dead, I can still access the flash by using system mode. I have a #3 camera on order, so I will review that when I receive it. Received 2 Nov 2009. I now know why my camera died. It has a bad flash chip. I was able to fix my camera. Here are the instructions. |
| 2010 XXX XX - XXXXXXXX | |

This work by Charles E Lohr is licensed under a Creative Commons Attribution-ShareAlike 3.0 Unported License. Google Analytics javascript is used on this page. Google Analytics Google Analytics IIS 6.0 There is no politically correct content on this web site. I have never owned an SUV. |
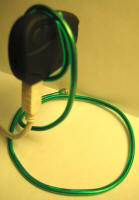
 My #1 camera must be in this vertical
orientation to take right-side-up images. Some #1 cameras
require horizontal orientation.
My #1 camera must be in this vertical
orientation to take right-side-up images. Some #1 cameras
require horizontal orientation.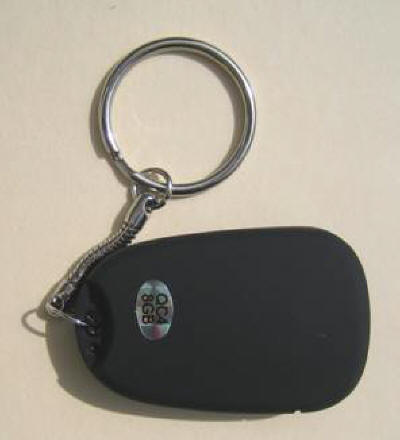
 BURNTOOL -Burntool will load the firmware into
the flash of the #1 camera . I think it also installs some BIOS
files into the ANYKA processor flash.
BURNTOOL -Burntool will load the firmware into
the flash of the #1 camera . I think it also installs some BIOS
files into the ANYKA processor flash.